GA4 introduces a shift in data collection methodology, shifting the focus from sessions to events. This transition allows for a more integrated measurement of user journeys across both web and mobile app platforms. Voizee seamlessly aligns with your existing GA4 account by transmitting your call, text, and chat data to the events you’ve set up.
Getting started
Before you start, you’ll need to have a GA4 property and have the gtag installed on your site.Integrating with Google Analytics 4
- Login to your Voizee account.
- Navigate to Settings > Website Widget > Widget Settings > Websites
- Select the website you want to edit and select the Widget Settings tab.
- Update Google Analytics Measurement Protocol setting.
- Click the Save button when done.
Sending Voizee data to Google Analytics 4
After you activate your integration in Voizee, there are a few other steps you’ll need to take before you can start seeing Voizee data in your GA4 reports. To complete the setup process below, you’ll need to receive an event through the integration first. For this reason, we recommend creating a test event (such as placing a callback call or submitting an SMS request from the widget) immediately after activating the integration so you can complete the setup process and start using your data in reports.Important
The settings you choose below do not apply retroactively, so it’s important to complete this setup process in GA4 soon after activating the integration. If you wait, any data sent over before you complete the setup cannot be used in reports. For each interaction type being sent to GA4, you’ll decide whether each interaction will be sent as a custom dimension or a custom metric.Create custom dimensions
You’ll need the Editor role to create custom dimensions. We recommend using custom dimensions for the following types of attribution data:- activity_id
- activity_status
- request_page_url
- source
- medium
- campaign
- first_time_caller
- engagement_time_sec
- call_duration
- GCLID
- Click Admin.
- Choose Custom definitions from the Data display menu.
- Make sure the Custom dimensions tab is selected (it is by default).
- Click Create custom dimensions.
- Name the dimension.
- Choose Event for the scope type.
- Give the dimension a description.
- Select the event parameter to associate with this custom dimension.
- Click Save.
Create custom metrics
You’ll need the Editor role to create custom metrics. We recommend using custom metrics for the following units of measurement:- call_duration (time: seconds)
- engagement_time_sec (time: seconds)
- Click Configure.
- Choose Custom definitions from the Data display menu.
- Make sure the Custom metrics tab is selected.
- Click Create custom metric.
- Name the metric.
- Choose Event for the scope type.
- Give the metric a description.
- Select the event parameter to associate with this custom metric.
- Select the unit of measurement to associate with this custom metric.
- Click Save.
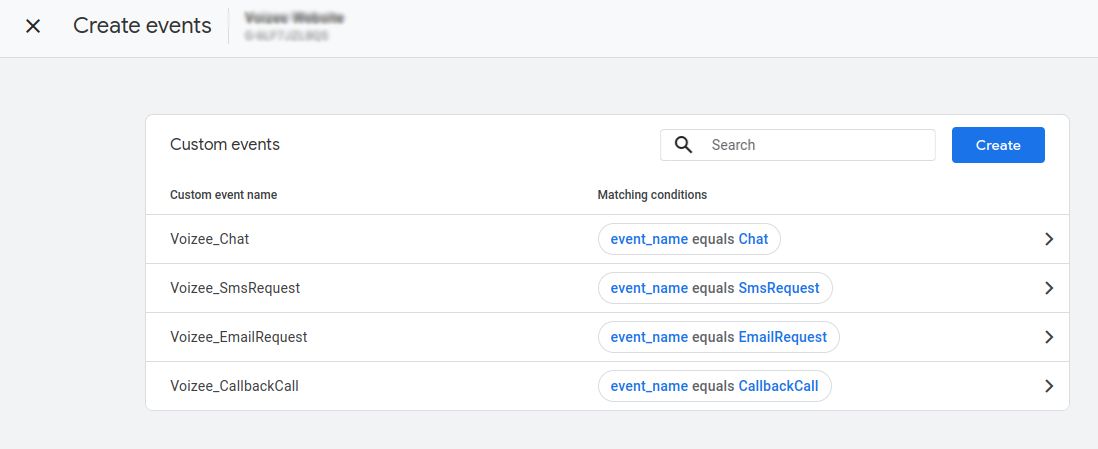
Create custom events
You’ll need the Editor role to create custom events. Follow the steps below to create a custom event in Google Analytics:- Click Admin.
- Choose Events from the Data display menu.
- Click Create event button.
- Enter Custom event name and Matching conditions

Marking events as key events (optional)
You’ll need the Editor role to mark an event as a key event. You can mark our events as key events in GA4. This is an optional step. However, by marking events as key events, you can see our events in Acquisition, Engagement, and Advertising reports. We recommend completing this setup after activating your integration and receiving the first phone call, text, or chat event in GA4. This can be the same test event we recommend creating after activating your integration. Follow the steps below to mark an event as a conversion in Google Analytics:- In Google Analytics, click Admin.
- Choose Events from the Data display menu.
- In the Existing events table, select the toggle under Mark as key event.
- CallbackCall
- SmsRequest
- EmailRequest
- Chat
- InboundCall
- InboundMsg