Path: Settings / Website Widget / Widget Settings
Quick Link: Widget Settings
To add a Voizee widget to your website, follow these steps:
- Navigate to Settings > Website Widget > Widget Settings.
- Click the ‘Add New Widget’ button.
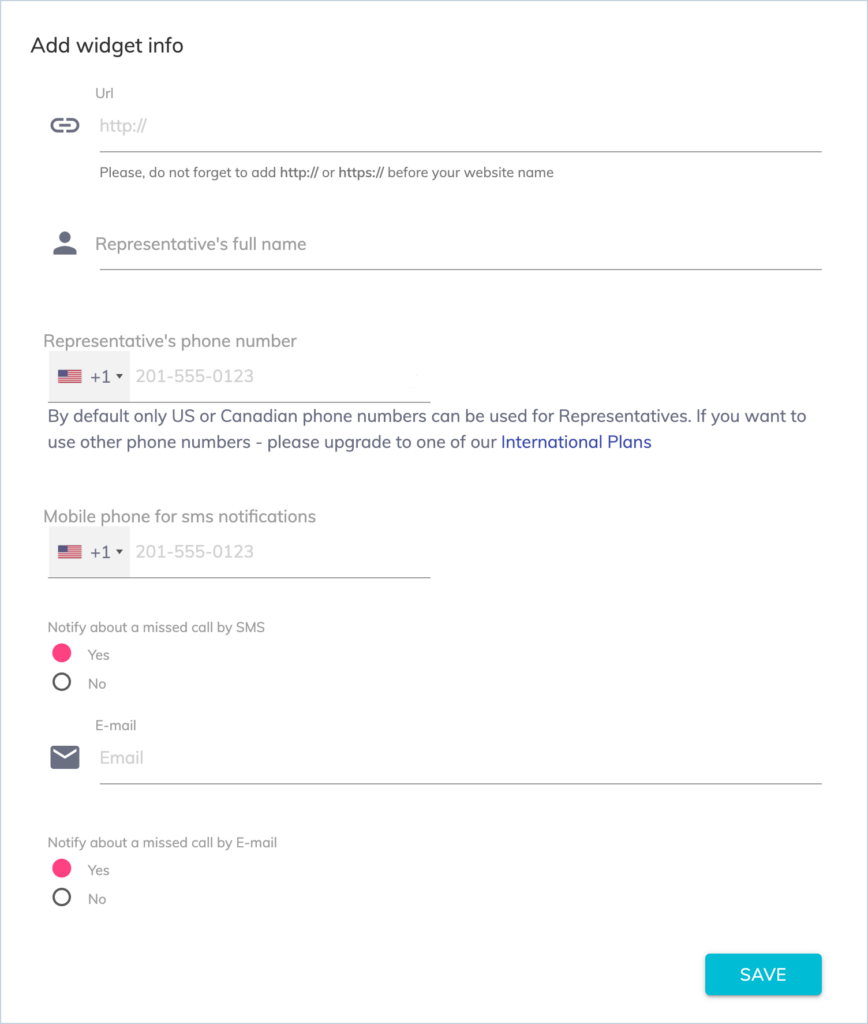
- In the pop-up window, enter the necessary initial information as detailed below.
- Use either Code Embed or our WordPress plugin to integrate Voizee with your website.
- For additional guidance, refer to the articles on configuring your Representatives, Widget Style, Schedule, Caller ID, and other settings.
Add widget form
- URL: List the full website address (including https://) where the Voizee widget will be installed. It’s better to copy and paste the URL address from the browser to avoid spelling errors.
- Representative’s full name: List the first and last name of the representative from your company who will accept incoming calls from the website.
- Representative’s phone number: The number where incoming calls from the website will be redirected. Please note that this phone number is not visible to the public.
- Mobile phone for SMS notifications: The number where text (SMS) notifications will be sent. It can be the same number listed in the previous step or another one.
- Notify about a missed call by SMS: Select the option to be notified about missed calls by text (SMS) message.
- Email: The email address listed in this field is used for notifications sent from the website, including notifications about successful calls, missed calls, callback requests, and scheduled calls.
- Notify about a missed call by E-mail: Select the option to be notified about missed calls by email.
- Click Save button.

Code embed
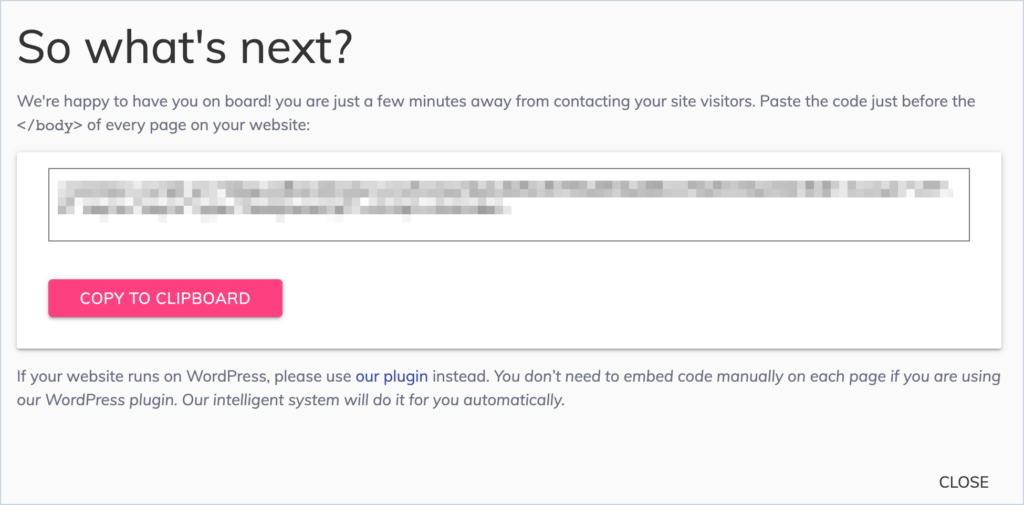
After all necessary information is entered and saved, a pop-up window will appear with the embed code. You will need this code if you manually install the Voizee widget on your website. If your website runs on WordPress, you can use Voizee plugin instead.

WordPress Plugin
Installing Voizee’s WordPress plugin is a straightforward process that enables you to integrate powerful communication tools into your WordPress website. To get started, simply navigate to the WordPress directory and search for “Voizee” in the “Plugins” section. Click on “Add New” and select the Voizee plugin from the search results. Once you find it, click the “Install Now” button, and after installation, activate the plugin to unlock its full range of features.
Learn more about how to configure the Voizee WordPress plugin here.
Support
Still feeling stuck? Please send us your questions using this form.